
[intro] When you have completed this guide, you will have applied HS codes to all of the products within your EKM online shop, allowing you to ship orders outside of the UK. [/intro]
[caution]Before you begin this guide, it’s essential that you have configured your IOSS settings first, by following the steps here. [/caution]
[warning]The IOSS, UKIMS and EORI settings are not compatible with the legacy Orders page. You can activate the new version of the Orders Section by following the steps in this guide. [/warning]
Manually Applying HS Codes
When you have added the HS codes to your IOSS settings, the next step is to add the codes to the relevant products. The best way to do this is to add a code manually to a single product and a product with variants first, which provides you with a template. You can then export your products to a spreadsheet and use the example product format to apply HS codes to the rest of your products.
1. From the Dashboard, click Products on the left-hand side: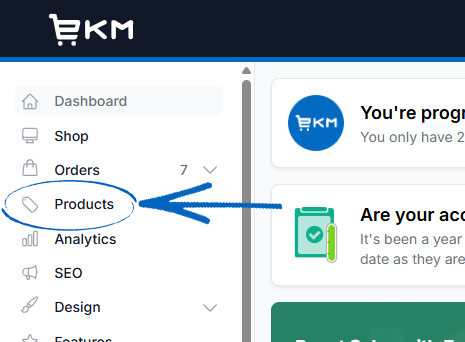
2. Click the Edit button on the right-hand side for a single product: 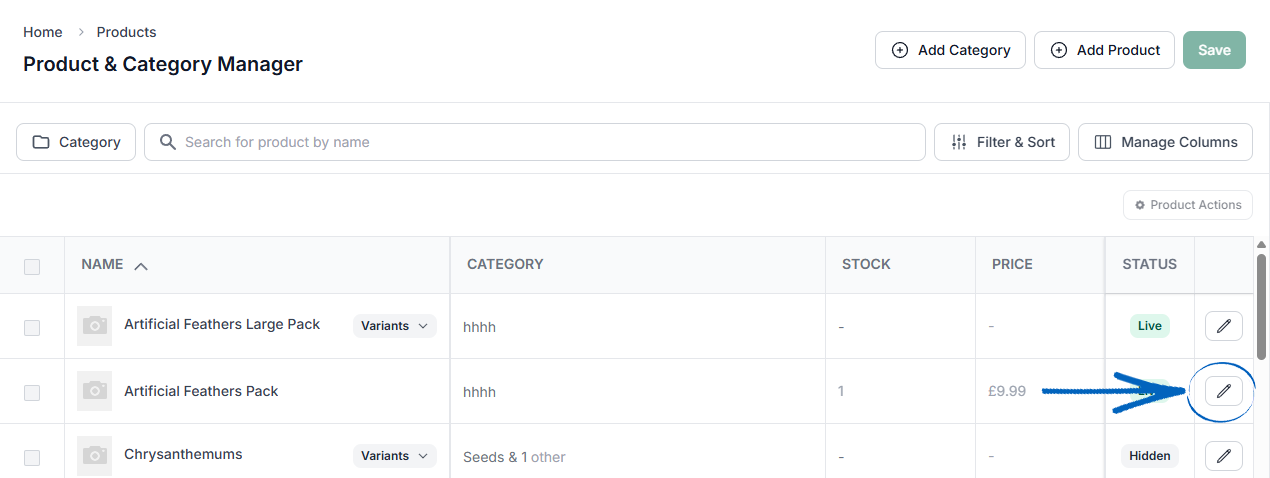
3. Within the Add-Edit Product window, scroll down and click in the HS Code field: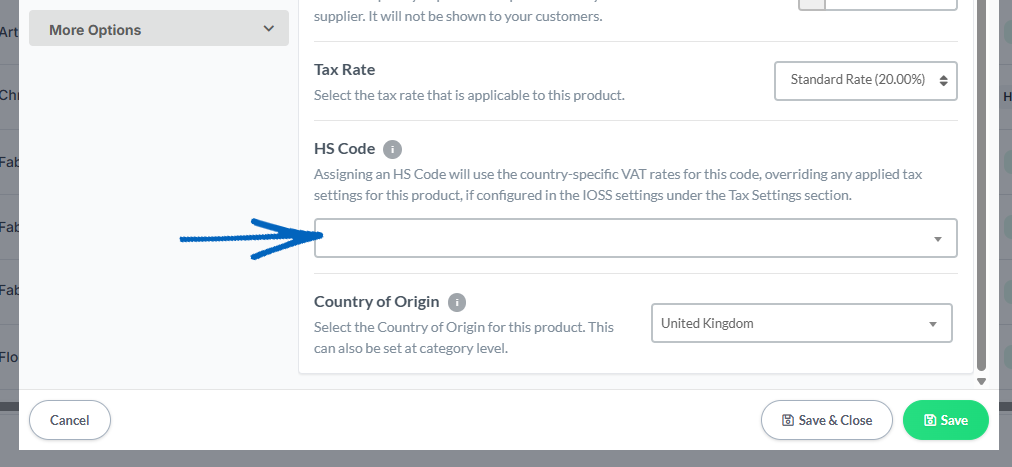
4. This will reveal a summary of the HS codes you added to your IOSS settings. Highlight the relevant code to select it: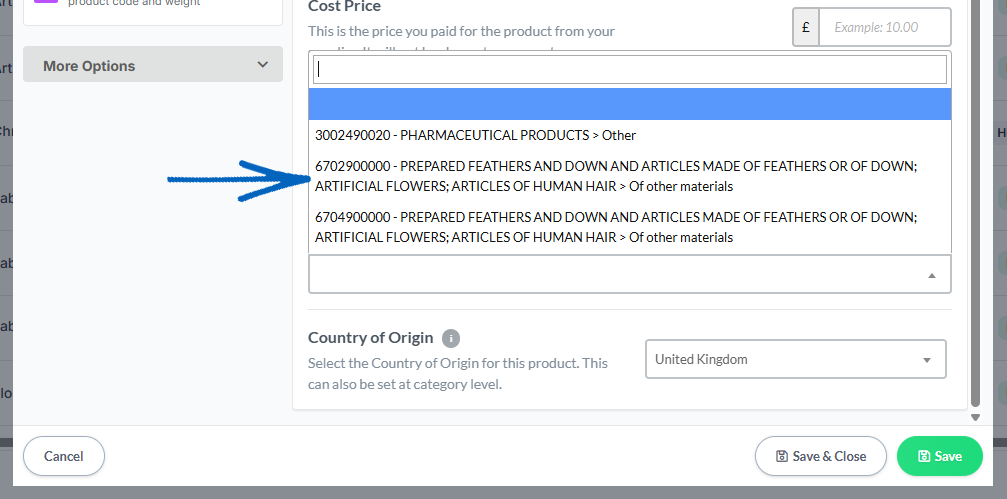
5. When you have selected the relevant HS code, you need to ensure that the Country of Origin field is correct and then click Save & Close in the bottom right-hand corner: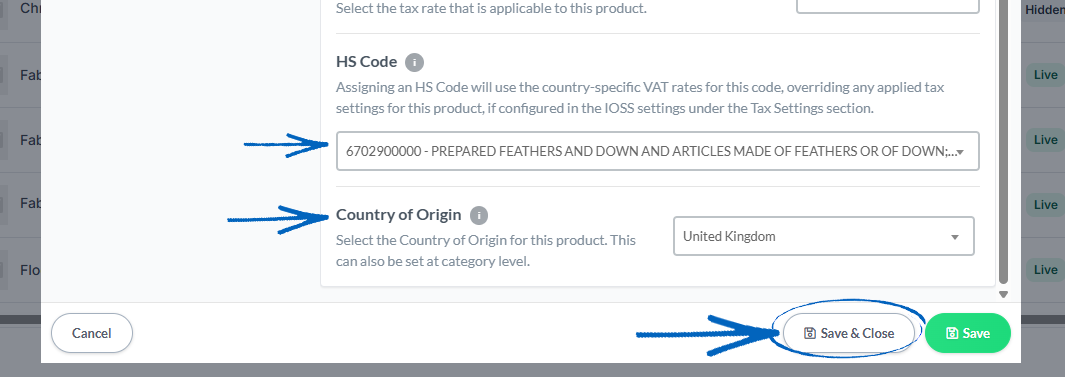
6. Now you need to edit a product with variants: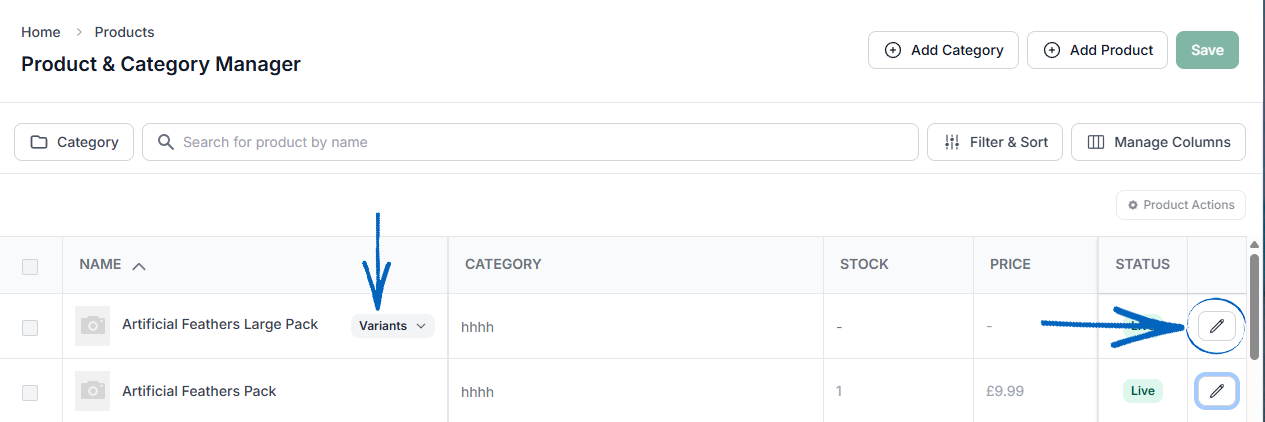
7. Within the Add/Edit Product window, click the Variants tab: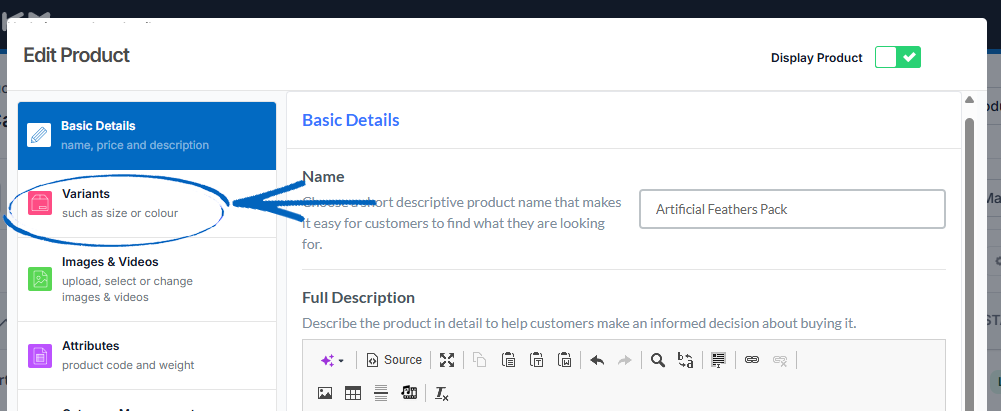
8. Click the Edit button the right of the first variant: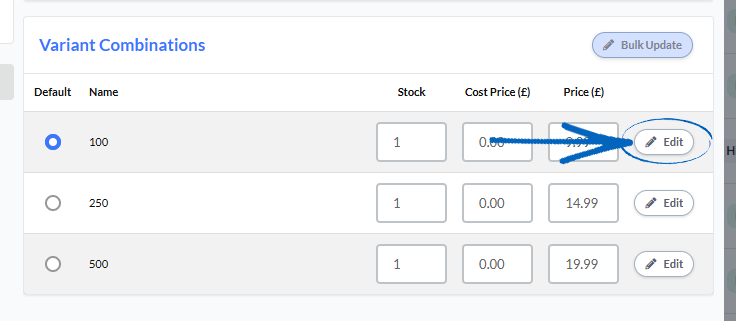
9. Click in the HS Code field: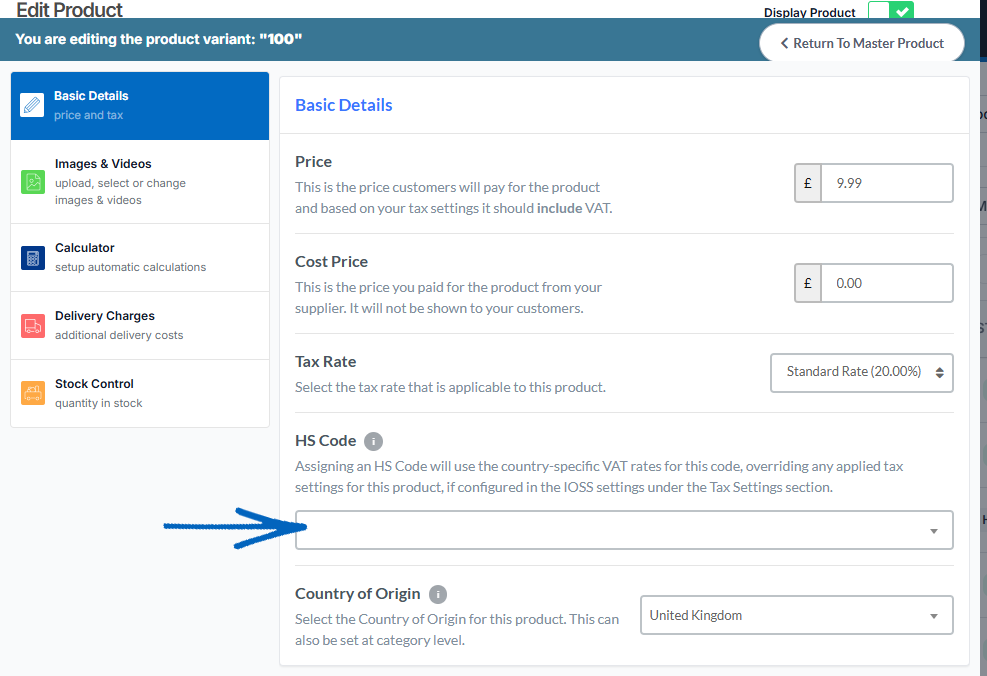
10. This will reveal a summary of the HS codes you added to your IOSS settings. Highlight the relevant code to select it: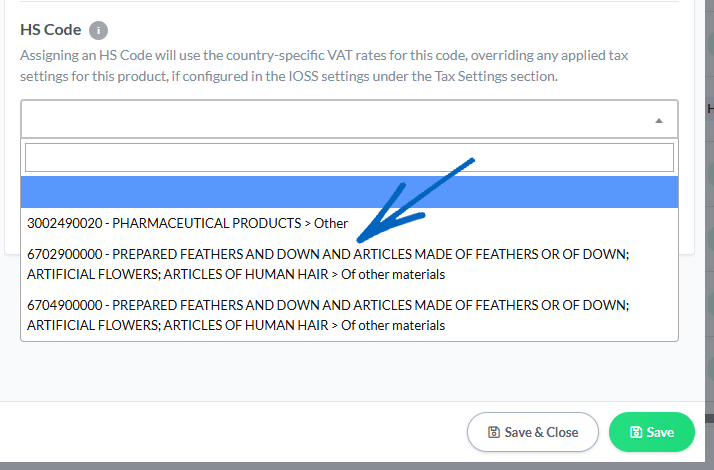
11. When you have selected the relevant HS code, check that the Country of Origin field is correct, click Save, and then Return To Master Product in the top right-hand corner: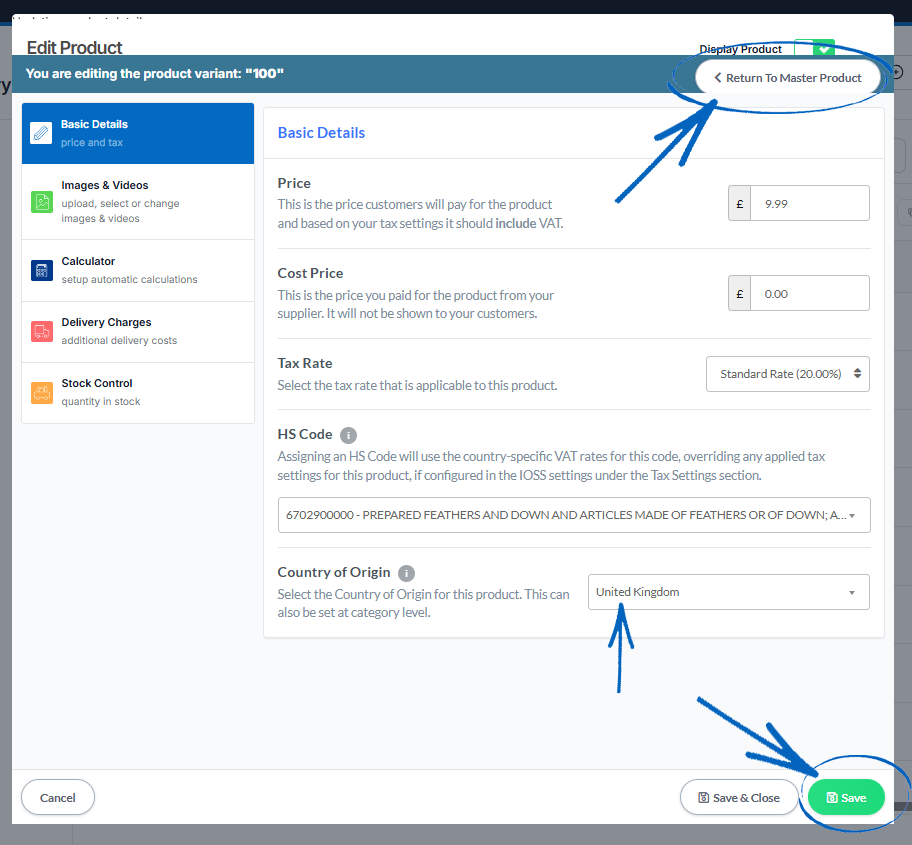
12. Repeat this with the next variant on that product, until all of variants have had their HS codes added: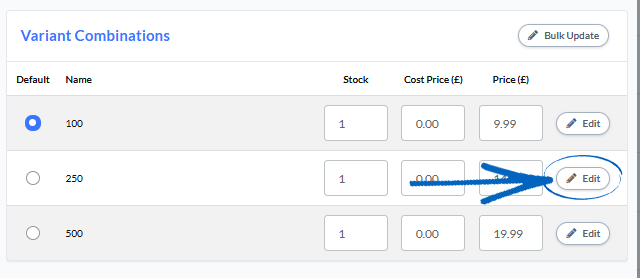
13. On the last variant, after adding your HS codes, click Save & Close: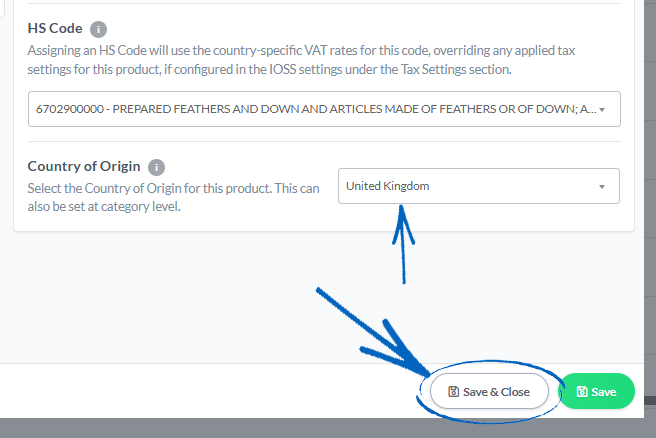
Using Spreadsheets to add HS Codes in Bulk
Now you have added HS codes to two products manually, you can use the Import/Export System feature to add HS codes to the rest of your product range by using spreadsheets.
14. From the Dashboard, click Features on the left-hand side menu: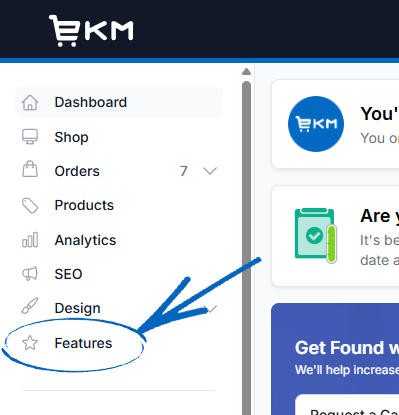
15. Click on the Import/Export System feature to open it: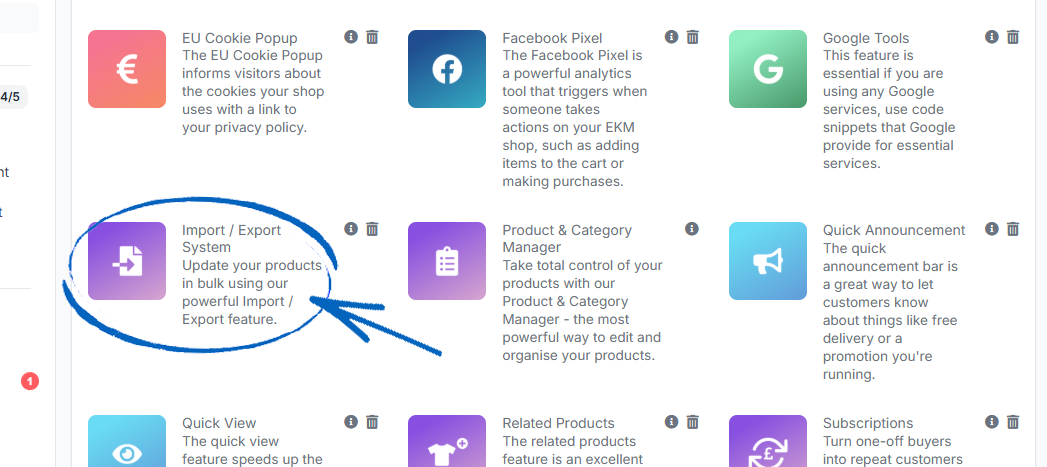
16. Click Export To File: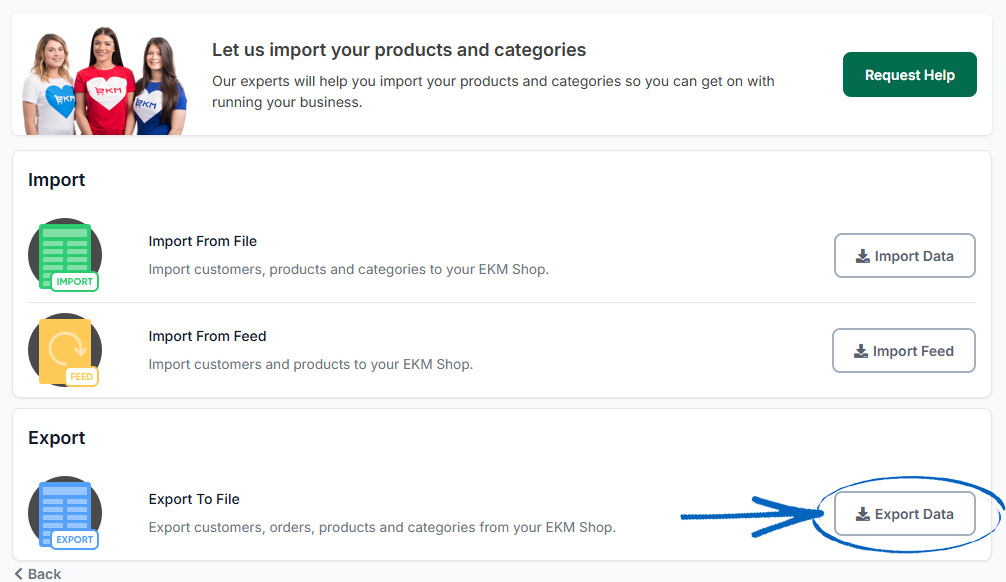
17. Click Export Products: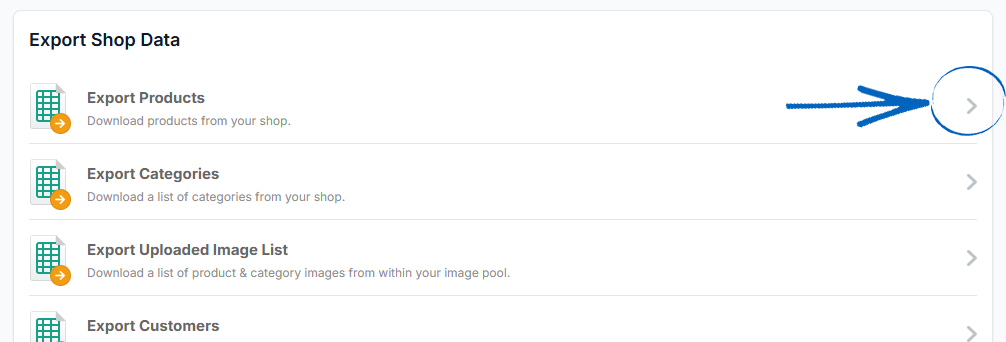
18. Click the green button: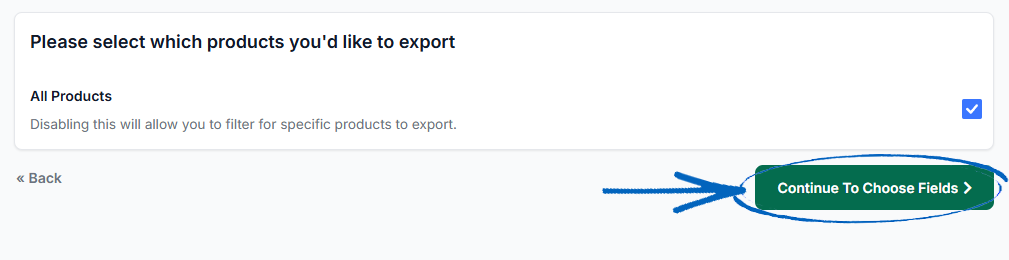
19. Click the green button: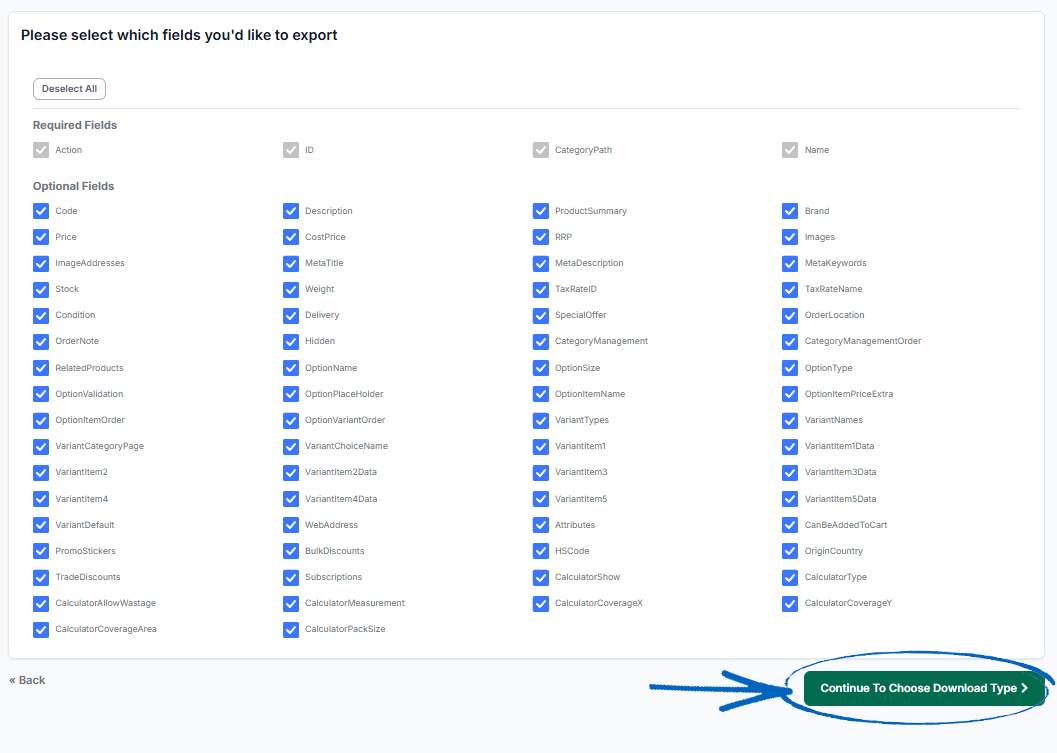
20. Select a CSV file if you have under 500 products to edit or bulk add to your website. If you have more products than this, select an XLXS file: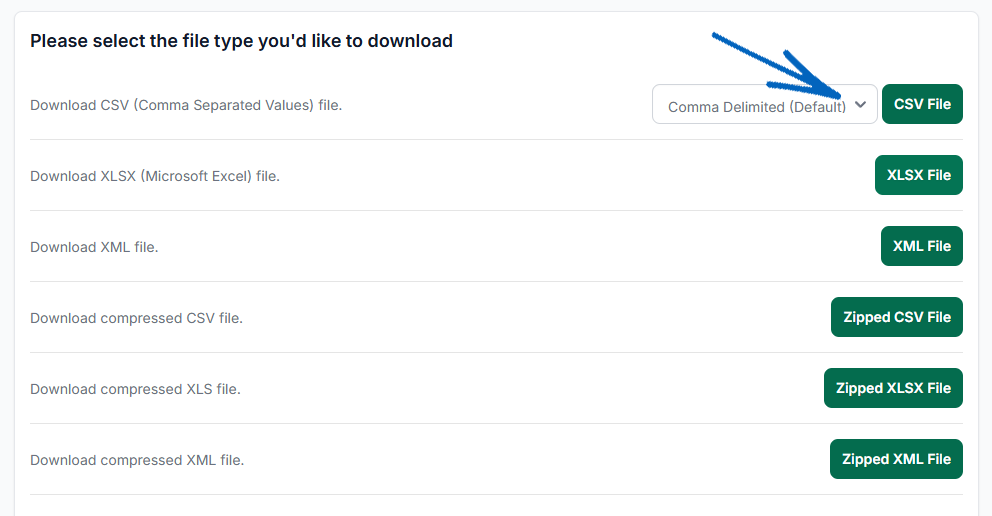
21. When your file is ready, click the link to download: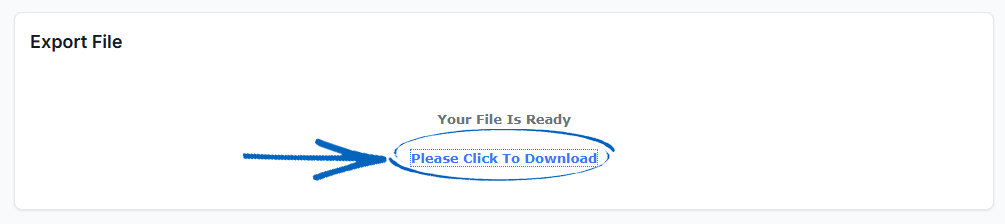
22. When you open your spreadsheet, scroll along to the columns HSCode and OriginCountry, where you’ll see the details that you added manually to your products: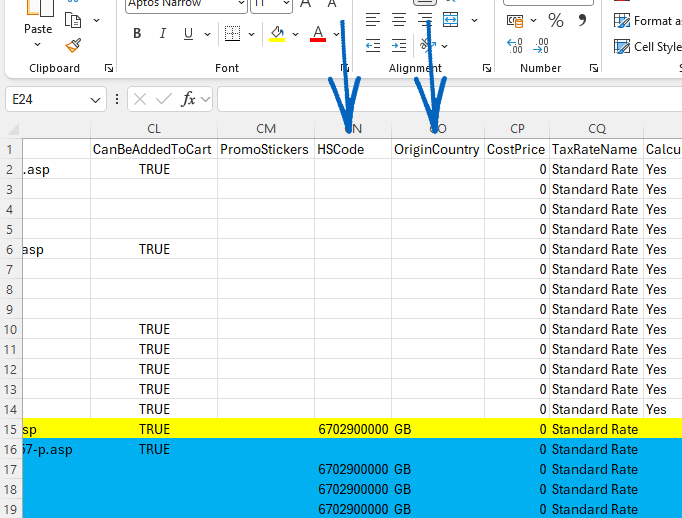
[tips]In the image above, the single product is the yellow highlighted row. The blue highlighted row beneath is a product with three variants. When adding HS codes to products with variants, you only need to populate the HSCode and OriginCountry columns for the Product Variant rows, not the default Product row. It’s a good idea to highlight your template products, as you will need to delete these from your spreadsheet before you upload it onto your EKM online shop. [/tips]
23. To begin the process of adding HS codes to the rest of your product range, highlight the first column of your spreadsheet by clicking the header: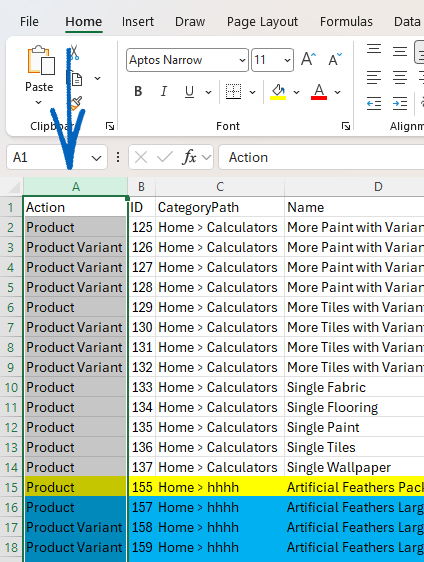
24. You then need to click the Find/Select button in the top right-hand corner: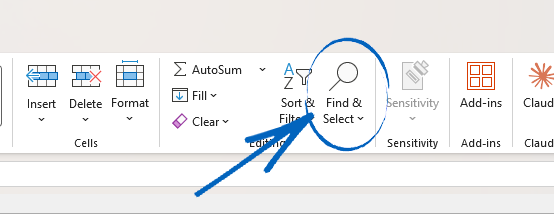
25. From the drop-down menu, select Replace: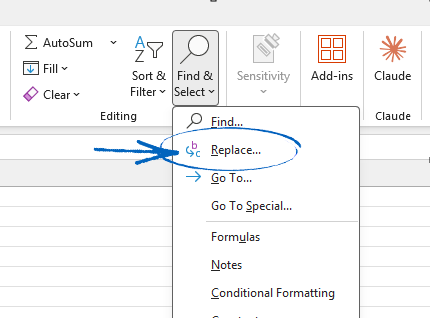
26. In the window that appears, add ‘Product’ to the Find What field, and ‘Edit Product’ to the Replace With field, before clicking Replace all: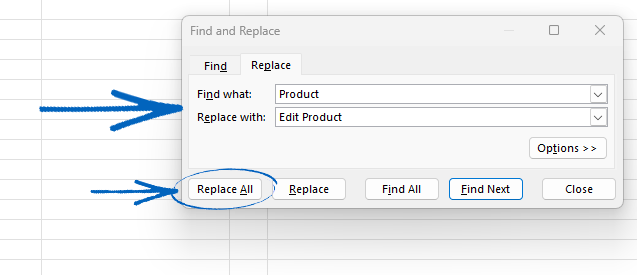
27. This will add the correct ‘Edit’ command to your spreadsheet for you to edit additional information onto your products: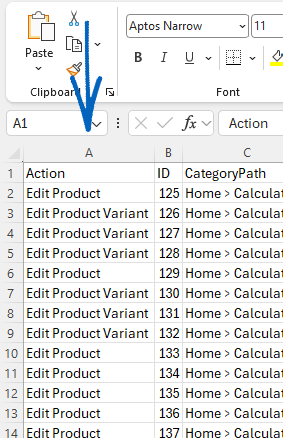
[remember]If you have any Products and Product Variants that you do not want to edit, you need to delete entirely them from your spreadsheet. You will also need to delete any Product Options too. [/remember]
28. Now you have added the Edit command, your next step is to add the HS codes to your products. Return to the IOSS settings on your EKM online shop and click the Export button on the right-hand side: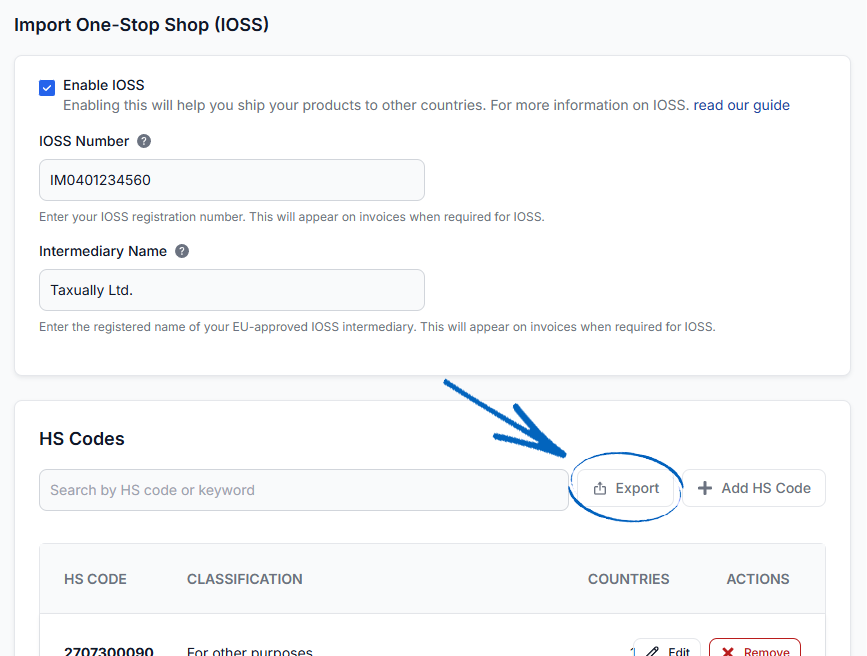
29. This will automatically download a spreadsheet to your computer, that lists both the HS codes you’ve added to your EKM online shop, the origin countries and relevant tax codes:
You can use this spreadsheet as a reference when adding HS codes and origin countries onto the rest of your product range.
[tips] You can find a full list of country codes for reference to the OriginCountry column by clicking here. [/tips]
30. When you have finished adding HS codes and origin countries to each of the products on your spreadsheet, delete the original template products from your spreadsheet: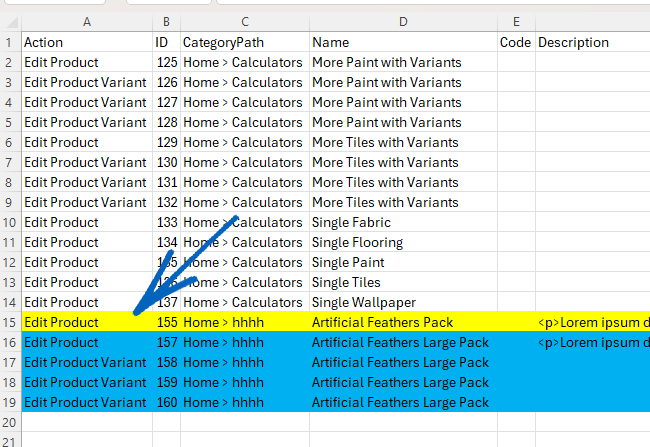
31. Now you need to save your spreadsheet and upload it back onto your EKM online shop. Within the Import/Export System feature, click Import Data: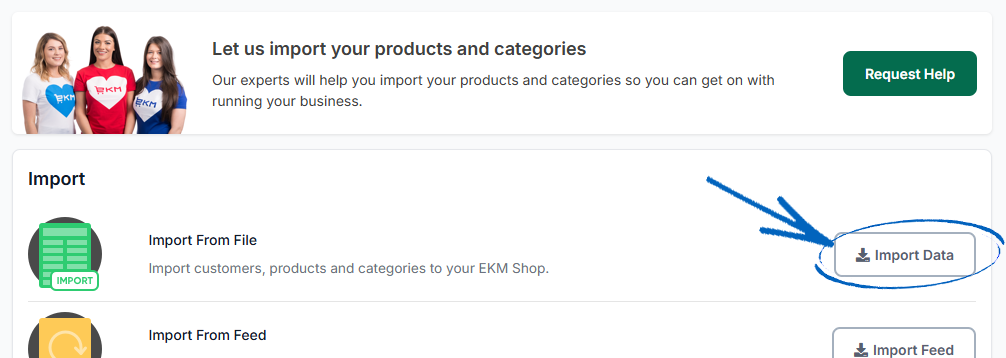
32. Click Choose File and select your spreadsheet from where it is located on your computer: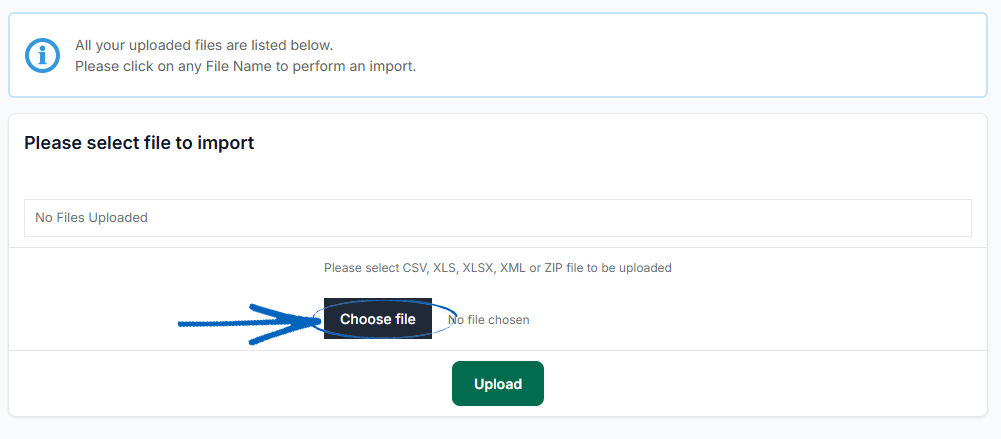
33. When you see the name of your spreadsheet displayed, click the green Upload button: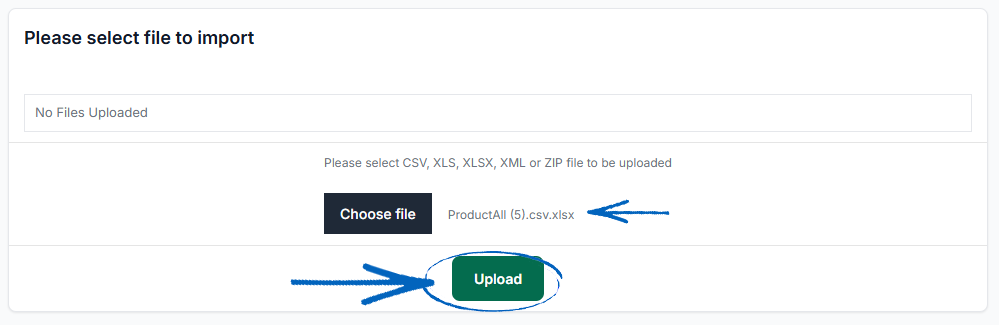
34. Now you need to click the name of your spreadsheet: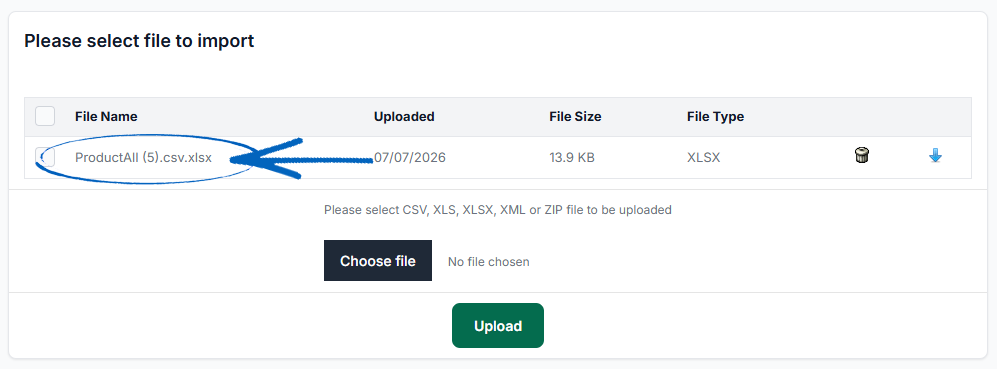
35. ALWAYS test a spreadsheet for errors before importing it to your EKM online shop. This ensures that the spreadsheet is checked and will not potentially cause any serious issues when it has been imported. Click Test For Errors: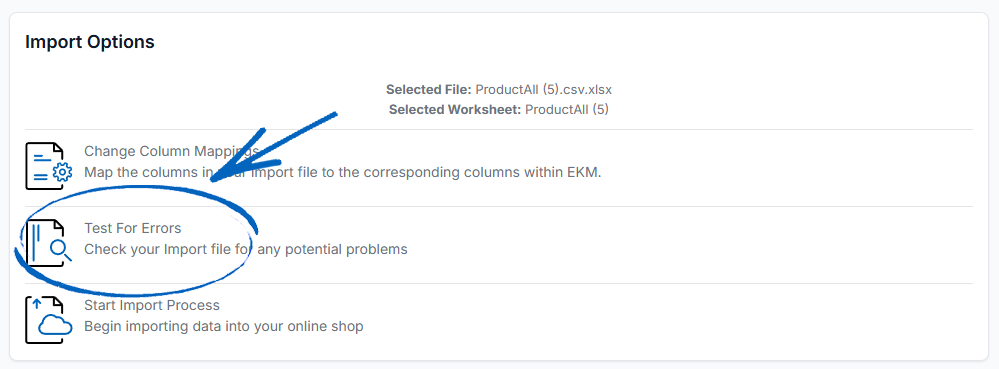
When the spreadsheet has been tested which can sometimes take a few moments depending on the number of products on it, click the Warnings and Errors bar below the large window to see the details of any problems the spreadsheet has. If there are any errors, these need to be rectified on your spreadsheet before uploading it to the site again and re-testing. If there are any references to ‘Unrecognised Header’, this is a guideline and not an error and can be ignored.
[remember]If there are any issues on your spreadsheet, note these down and then click Back on your browser to return you to the previous page. You will need to click the dustbin symbol to delete the spreadsheet from your EKM online shop, before returning to your copy of it and amending the issues that were highlighted. When you have amended those issues, save your spreadsheet, upload it and test it again. [/remember]
36. When the spreadsheet has been tested and no issues are reported, click the Start Import Process header to import the new products to your site: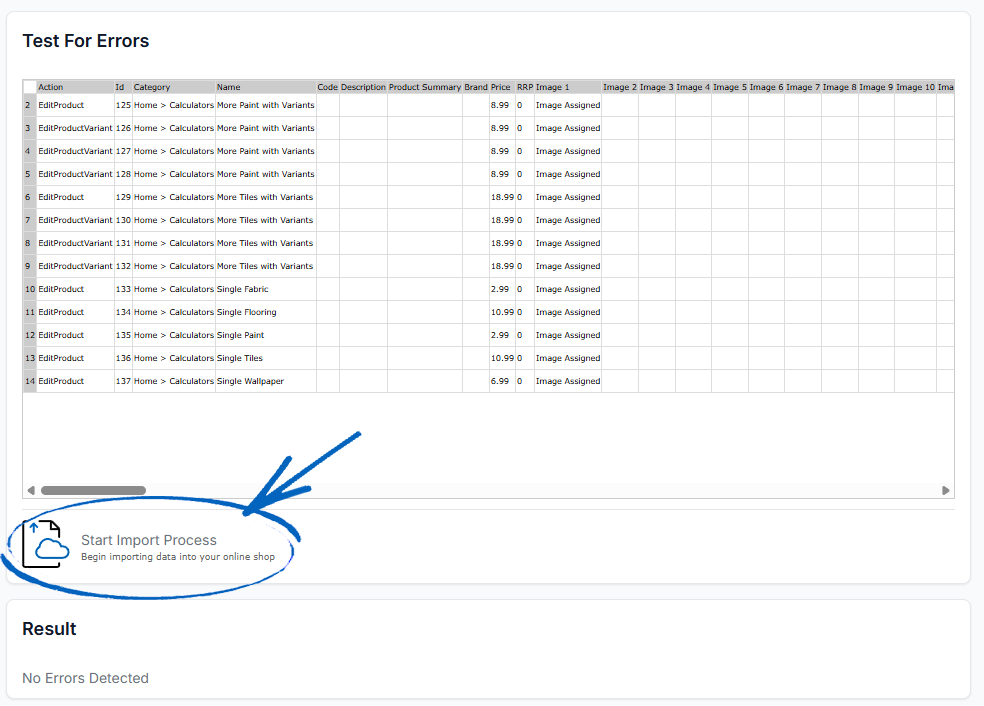
37. When you have pressed Start Import Process, you will see this screen. Do not navigate away from it and simply leave the system to complete the task before clicking the Done button: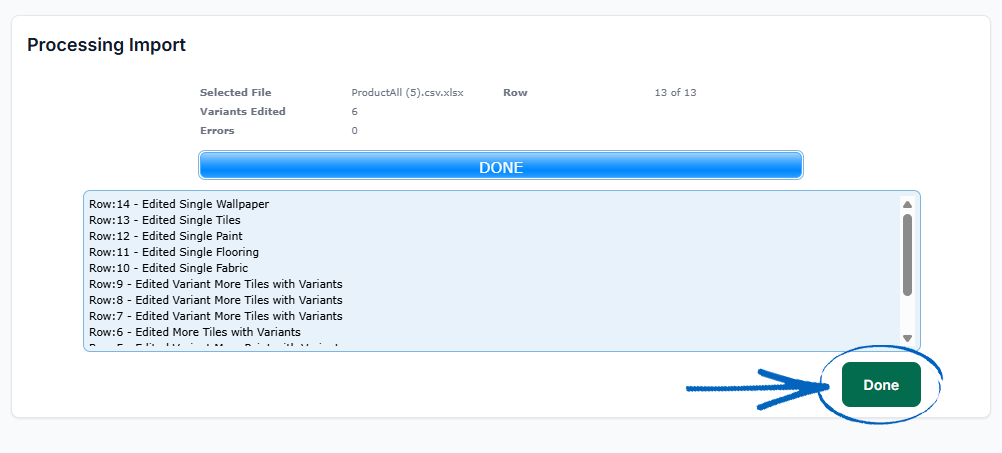
[more]
[/more]
[contact]If you need our help with your EKM online shop, contact the Customer Support Team, who can point you in the right direction. Our opening hours are 9 am - 5.30 pm Monday to Friday, for telephone calls, live chats, and emails. Outside of these hours, you can leave a message for us in the live chat window or email [email protected], and we will answer as soon as possible. If you'd like to suggest a feature or an upgrade on any of the EKM platforms, please let us know on the EKM Suggestions Board. [/contact]