
[intro] When you have completed this guide, you will have configured the IOSS, UKIMS and EORI settings on your EKM online shop, which allow you to ship item orders outside of the UK. [/intro]
[summary]
- Import One-Stop Shop (IOSS)
- Importing your HS Codes
- Exporting your HS Codes
- UK Internal Market Scheme (UKIMS)
- Displaying your UKIMS Number on the Invoice
- Economic Operators Registration & Identification (EORI)
- Displaying your EORI Number on the Invoice
- Creating an EORI field on your Checkout Flow
[/summary]
[caution]Before you begin, ensure that you have configured your Tax settings first by following the steps in this guide. [/caution]
[warning]The IOSS, UKIMS and EORI settings are not compatible with the legacy Orders page. You can activate the new version of the Orders Section by following the steps in this guide. [/warning]
Locating the Settings
1. From the Dashboard, click the Settings symbol in the bottom left-hand corner: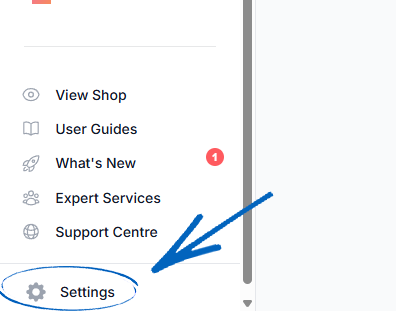
2. Click Tax on the left-hand side menu: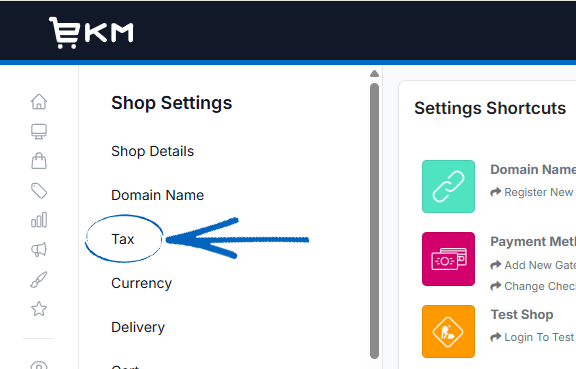
3. You’ll then see these settings: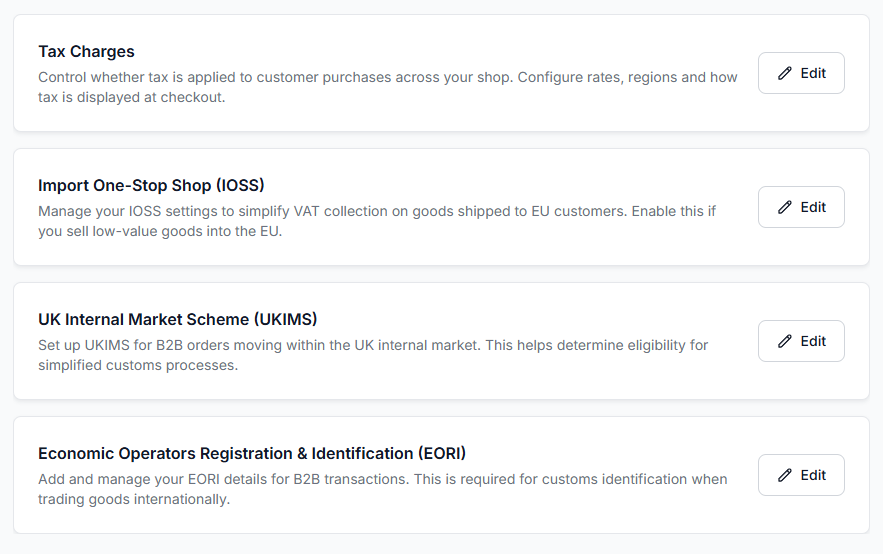
Import One-Stop Shop (IOSS)
IOSS is required for selling goods into the EU on consignments under €150, allowing you to collect and remit VAT at the point of sale rather than your customer being charged at the border.
1. Click the Edit button on the right-hand side: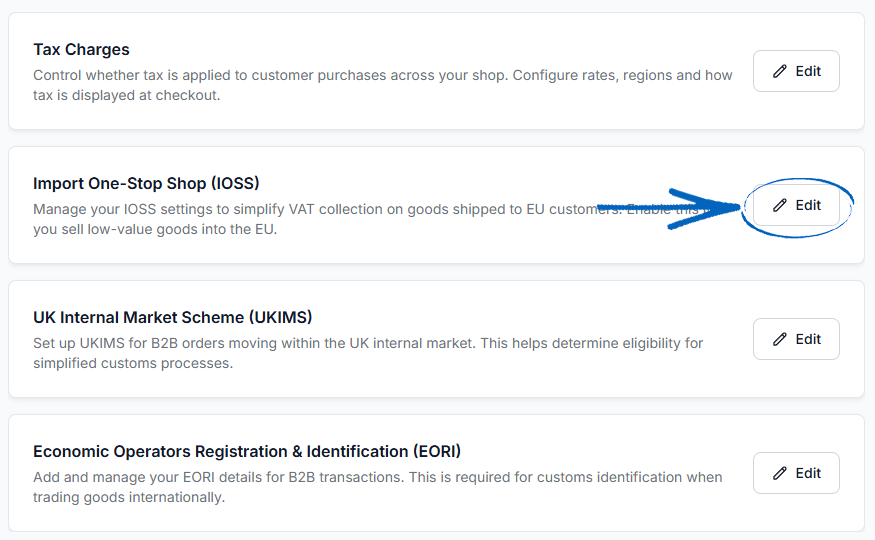
2. Tick the box: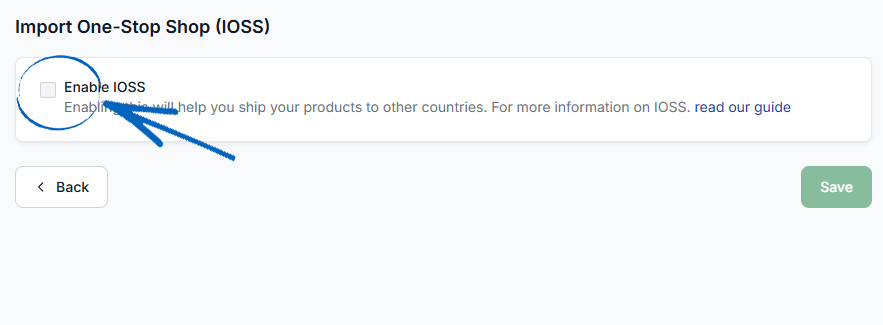
3. You’ll then see these fields: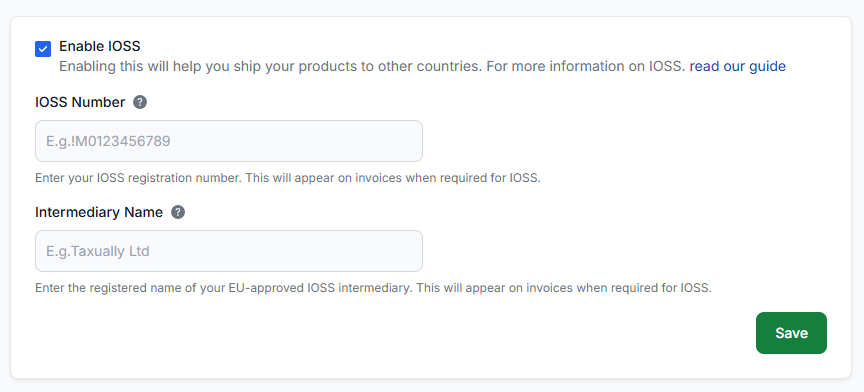
4. Now you need to add in your 12-character IOSS number into the first field, without spaces: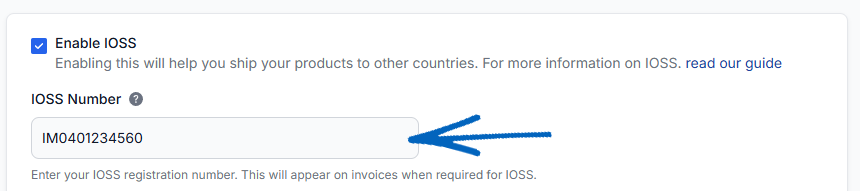
The EU IOSS system will only validate number in the correct format. If you have not already registered for an IOSS number, you need to follow the steps here to begin your application.
[remember] An IOSS number will typically consist of:
- IM = This stands for ‘import’. Every IOSS number begins with IM.
- Numbers 3-5 = These digits are the ISO code identifying the EU Member State where the business (of its intermediary) is registered for IOSS. For example, 040 = Ireland, 276 = Germany, 250 = France, etc.
- Numbers 6-1 = These digits are the unique identifier for your specific registration, which is assigned by that EU Member State’s tax authority.
- Number 12 = This final digit is a check number, used by customs systems to validate the entire IOSS number.
In the example used, IM0401234560 would indicate a registration held in Ireland (040), with unique national reference 123456, and a check digit of 0. As a UK-based seller, following Brexit, the requirement for an EU intermediary extends to UK businesses. So your IOSS number would reflect whichever EU country your intermediary is registered in, not the UK.
[/remember]
5. Below the IOSS number field, you need to add in the name of your Intermediary, before clicking the green Save button on the right-hand side: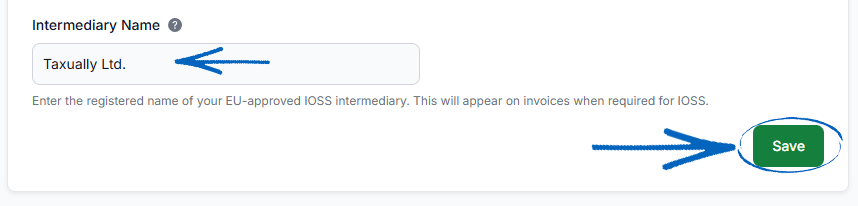
6. Scroll further down and you can click the button to add your HS Codes: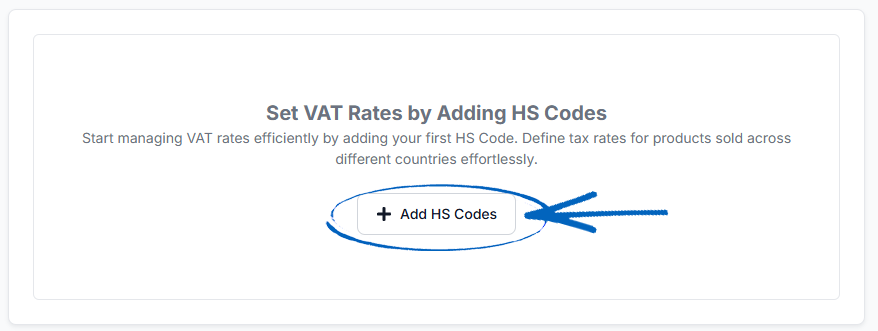
[remember] HS Codes are essentially universal product classification numbers that inform each country’s customs system what items are and how much tax should be charged for them. You can look up the codes for your products here. [/remember]
7. You’ll then see this page: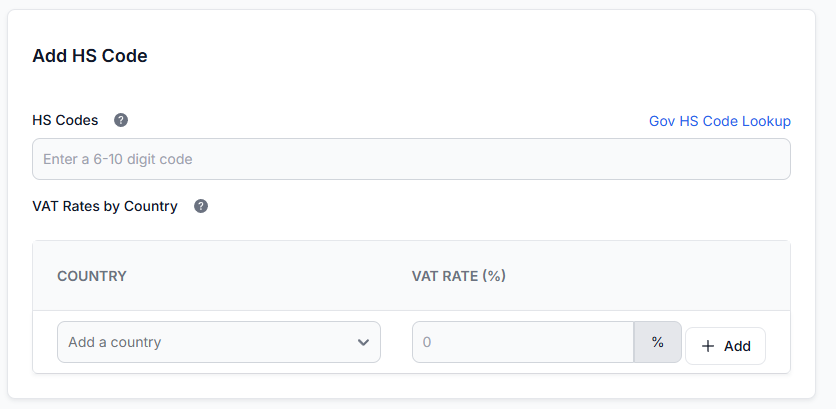
8. Your next step is to add the HS codes for your products and then add the tax rates for each of the countries you will ship to, applicable to each code. Add the code to the HS Codes field, and below, add the country and the applicable tax rate in the fields, before clicking the Add button: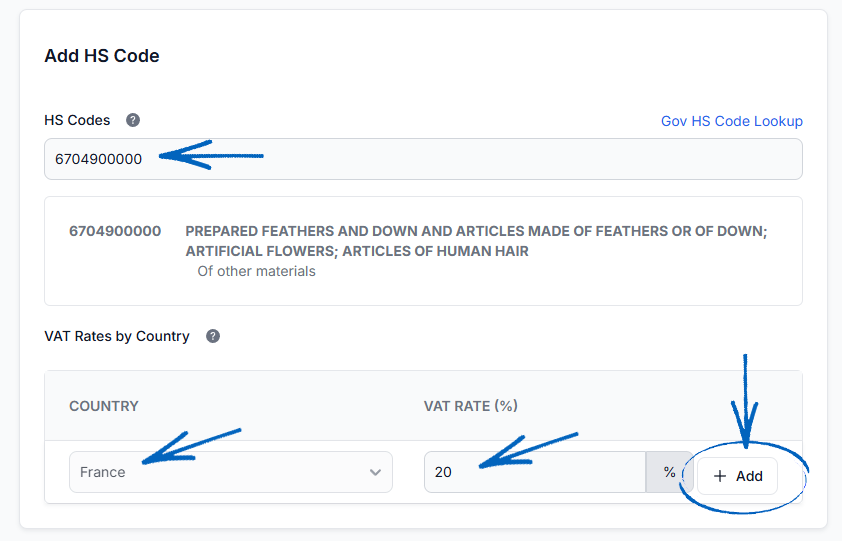
[caution] Any numbers added into the HS Codes field will be validated, allowing you to select the relevant classification. If it is not possible to save your HS code, please ensure that it has been added correctly to the field. [/caution]
9. Repeat this process for each code, ensuring you include tax rates for each of the countries you will ship products to.
[tips]Click the link in the top right-hand corner of the page to search for codes and tax rates: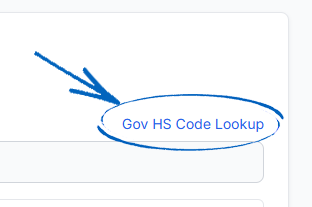
[/tips]
[caution]Make sure the countries you select here co-ordinate with those you have set on the Order Restrictions page within Settings, and any Delivery Methods you have set up on your EKM online shop. [/caution]
10. This will return you to the main IOSS page. Click Back: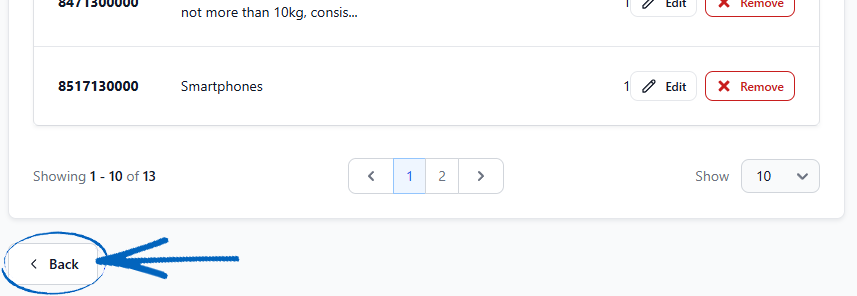
Importing your HS Codes
1. You can also import HS codes and their rates to your EKM online shop, which is ideal if you sell a lot of different kinds of products. Click the Import button on the right-hand side: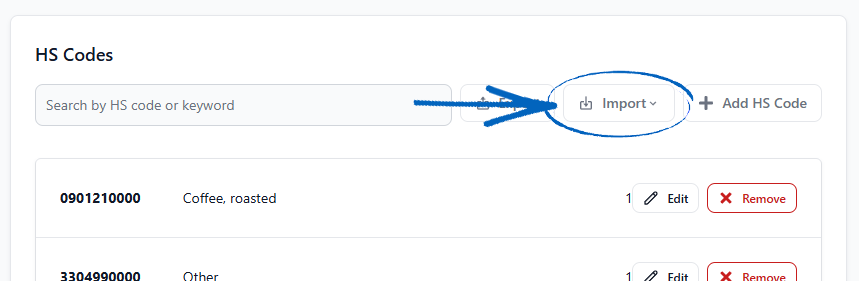
2. From the drop-down menu, select Download Template: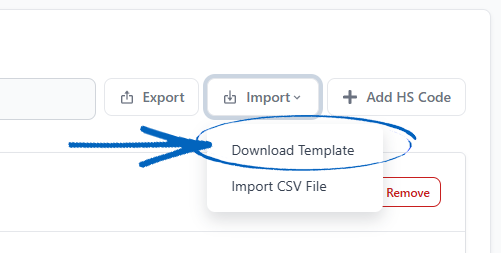
3. This will automatically download a spreadsheet to your computer. Open this spreadsheet, and you'll see it's been pre-populated: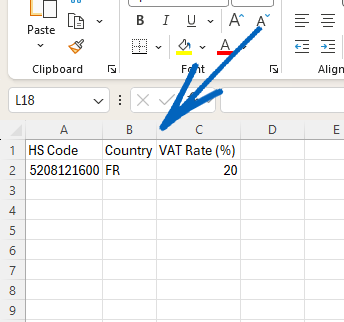
4. Using the data on row2 as a guideline, add your HS code, then the country code, and finally, the rate of tax for that country. Repeat this process until all of your country codes and HS codes have been added. Your next step is to delete row 2: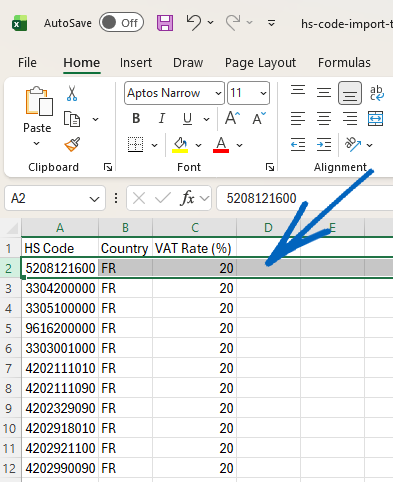
[tips]You can find a list of country codes in this guide. [/tips]
5. Now you need to save your spreadsheet as a .CSV file. Return to the browser tab displaying your EKM online shop, and click Import, and select Import CSV file from the drop-down menu: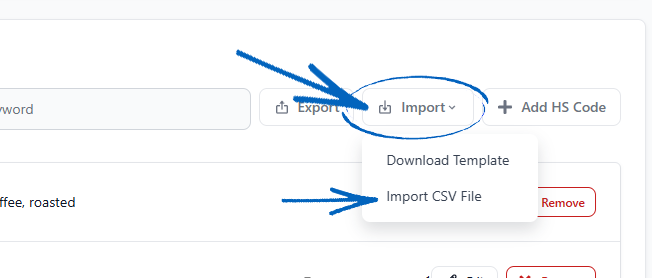
6. When you've selected the spreadsheet on your computer, you'll then see this screen. Click the green button in the bottom right-hand corner: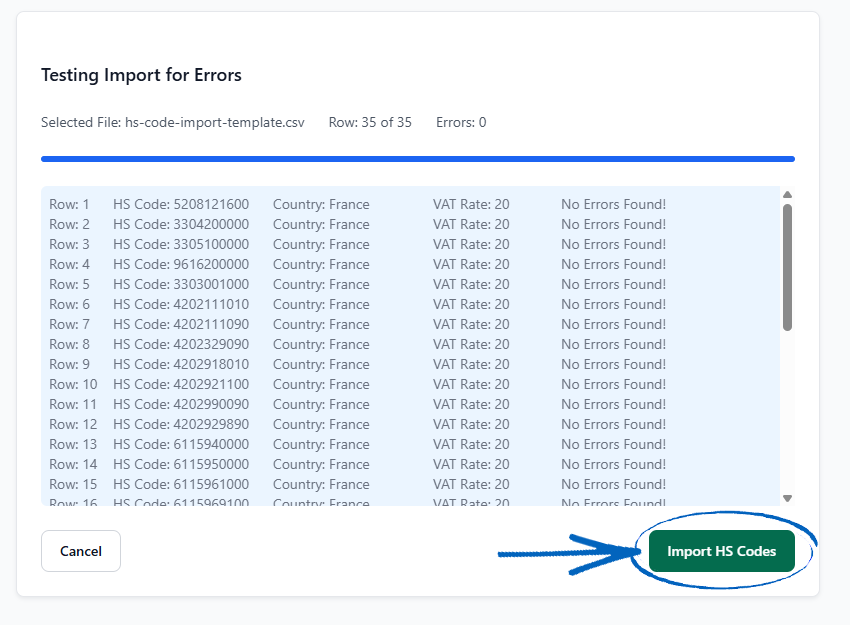
7. You'll then see the green 'success' notification: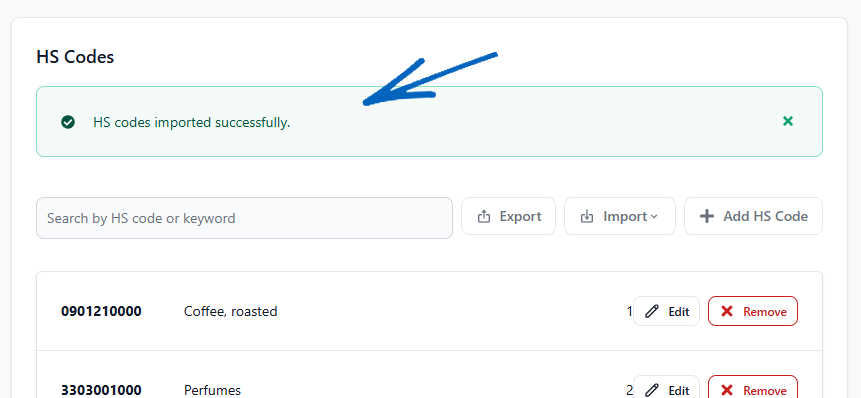
Exporting your HS Codes
1. You can export all of the HS codes that you've added onto your EKM online shop, by clicking the Export button: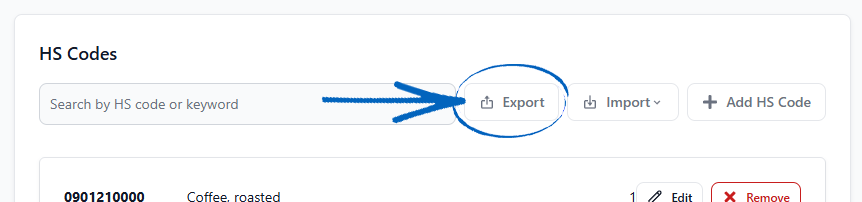
2. This will automatically download a spreadsheet to your computer, listing the HS codes, countries, VAT rates and descriptions for each code: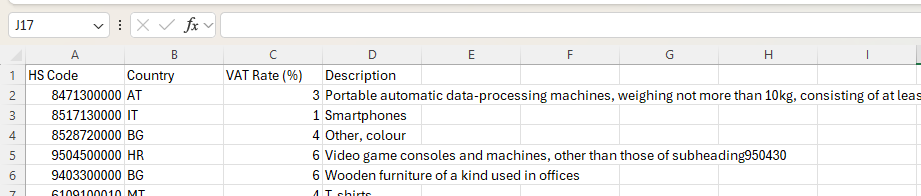
UK Internal Market Scheme (UKIMS)
To ship products from the UK to Northern Ireland, you will need to configure these settings. If you don’t have a UKIMS number, click here to begin the application process.
[remember] You will need an EORI number to apply for UKIMS. If you don’t have an EORI number, click here to begin the application process. [/remember]
1. Click the Edit button on the right-hand side: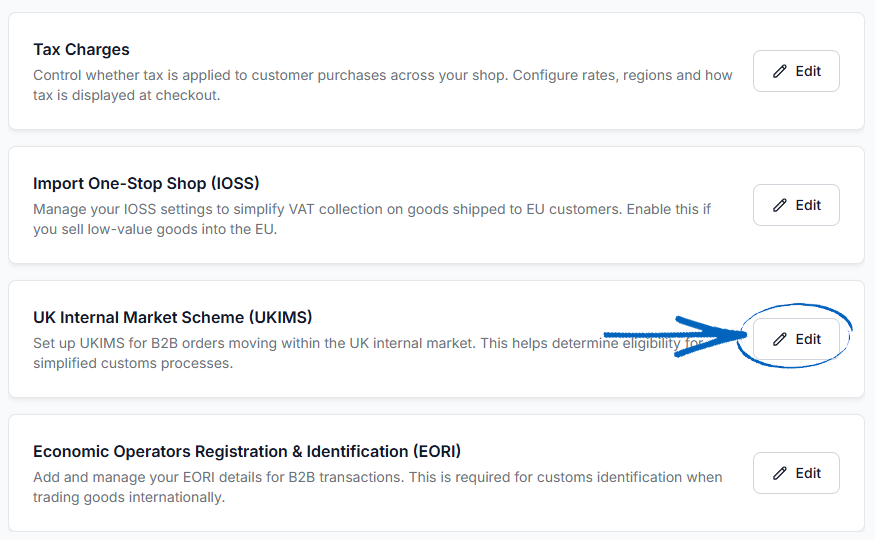
2. Tick the box: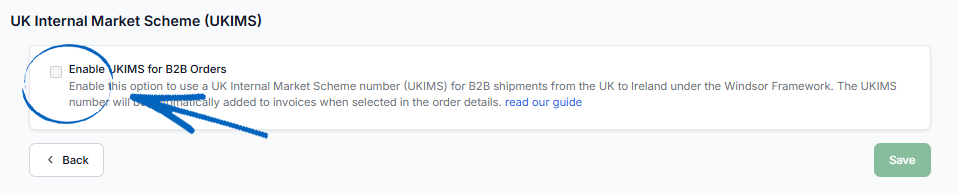
3. You’ll then see this field appear. Add in your UKIMS number: 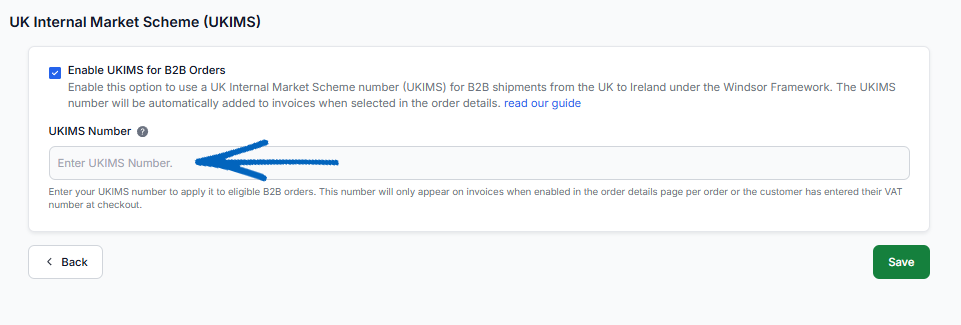
4. Click the green Save button on the right-hand side, before clicking the Back button on the left: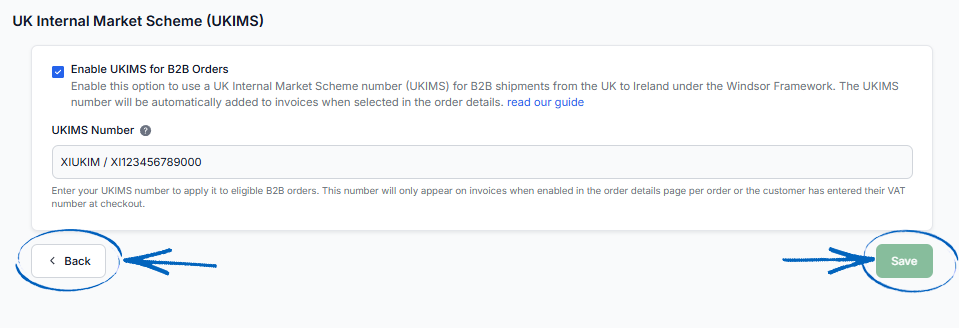
[remember] A UKIMS authorisation number follows this format: XIUKIM + your XI EORI number. An example would look something like: XIUKIM / XI123456789000
The XI prefix is significant as it's the identifier used for Northern Ireland in customs systems post-Brexit. Your XI EORI number is essentially your GB EORI number but with the GB prefix swapped out for XI. It's worth noting this is similar in concept to how IOSS numbers have a consistent format (IM + country code + numbers), in that the structure itself tells customs systems exactly what the number refers to and where it's from. [/remember]
Displaying your UKIMS Number on the Invoice
When you have configured your UKIMS settings, you'll notice that there's a checkbox visible on each of your orders:
If that order is a B2B order going from the UK to Ireland with a total value of over £135, you need to tick the box to ensure your UKIMS number is displayed on the invoice. If not, you can ignore the box.
Economic Operators Registration & Identification (EORI)
EORI stands for Economic Operators Registration and Identification number. It's essentially a unique ID number that customs authorities use to identify businesses involved in importing or exporting goods internationally. An EORI is required for any international customs movement, so that includes EU exports but also importing stock from anywhere in the world, and as mentioned it's also a prerequisite for UKIMS. If you don’t have an EORI number, click here to begin the application process.
1. Click the Edit button on the right-hand side: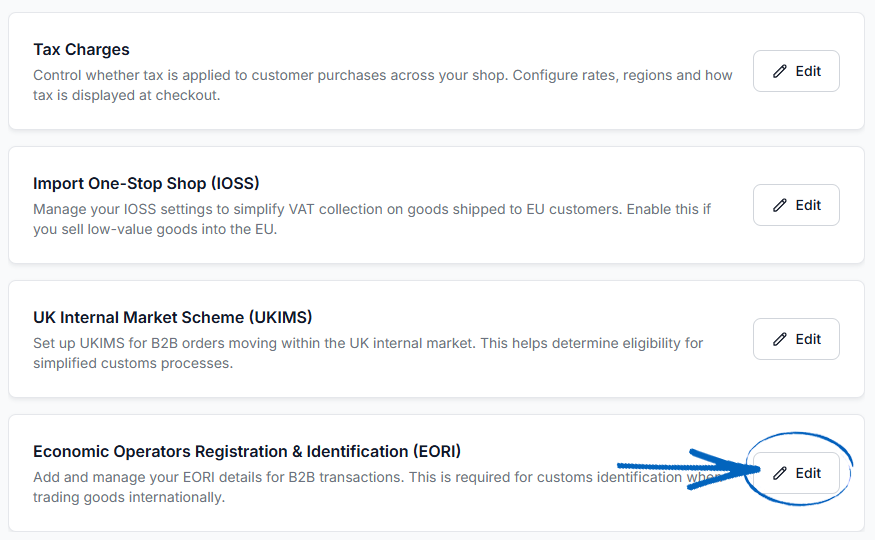
2. Tick the box: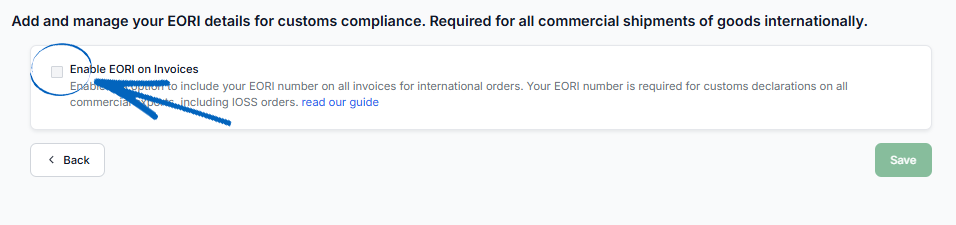
3. Add your EORI Number to the field provided: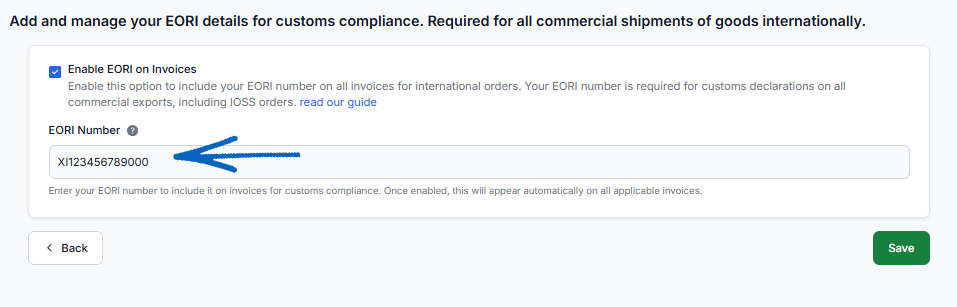
4. Click the green Save button on the right-hand side and then the Back button on the left: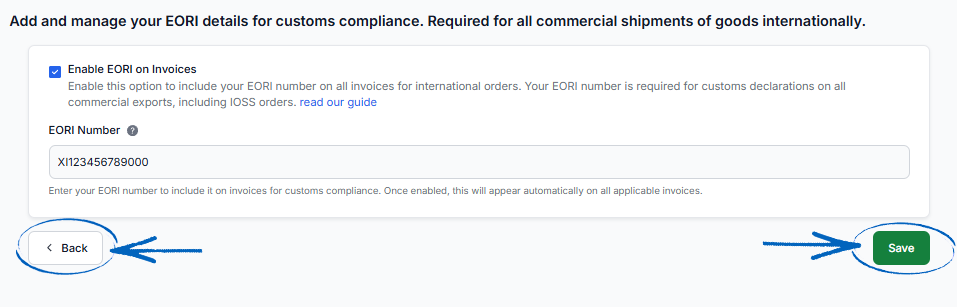
Displaying your EORI Number on the Invoice
When you have configured your EORI settings, you'll notice that there's a checkbox visible on each of your orders:
If that order is being shipped internationally where a customs declaration is required, you need to tick the box to display your EORI number on the invoice. If the order doesn't cross a customs border, you can ignore the box.
Creating an EORI field on your Checkout Flow
1. If your EKM online shop regularly makes B2B transactions, you'll need to create a field for your customers to add their own EORI number during the Checkout Flow which will then be displayed on the invoice. To do this, click Settings: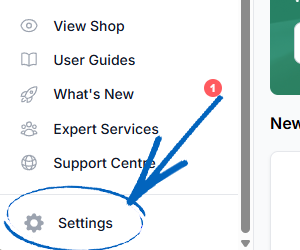
2. Click Checkout on the left-hand menu: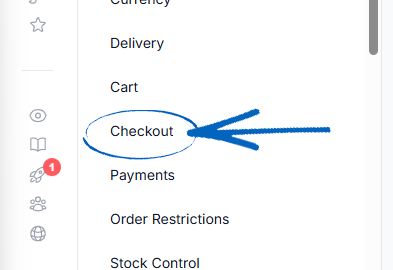
3. Scroll down this page, and click Order Summary: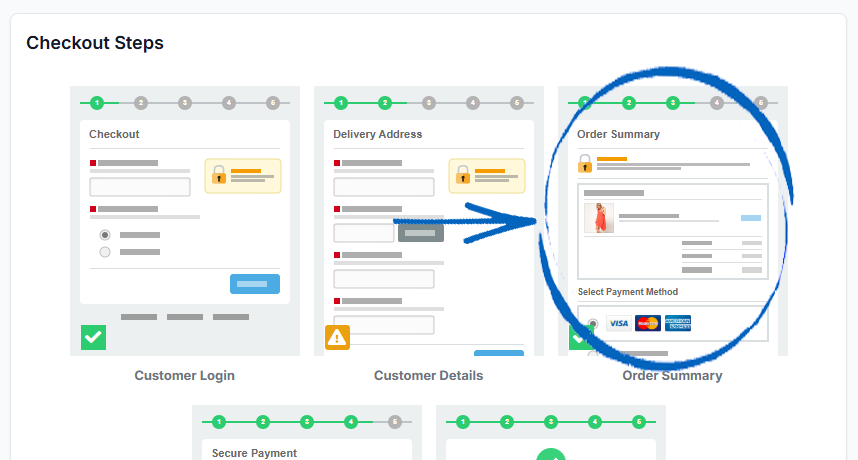
4. Click the Edit button on the right-hand side for Additional Information Fields: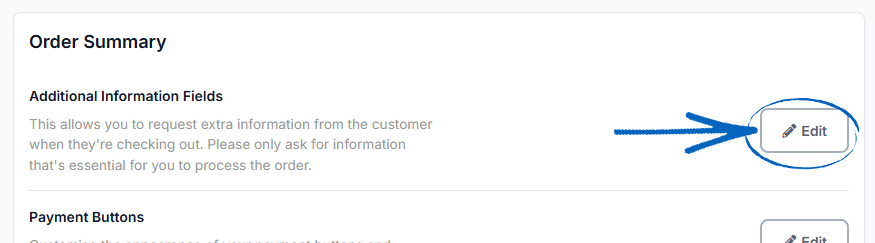
5. Click the green button: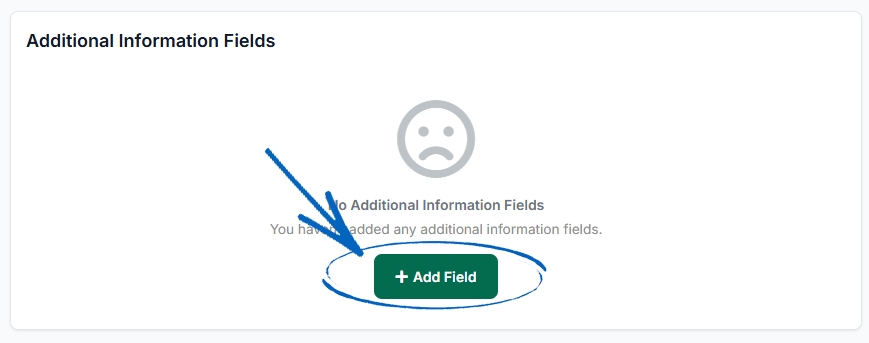
6. Select Short Text Box: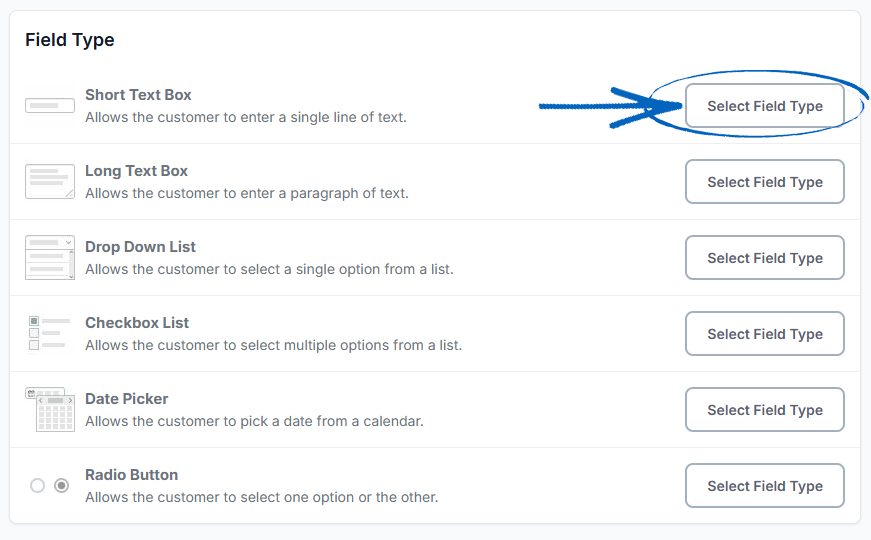
7. Now you need to complete the fields for your customer to add their EORI number, before clicking the green button in the bottom right-hand corner: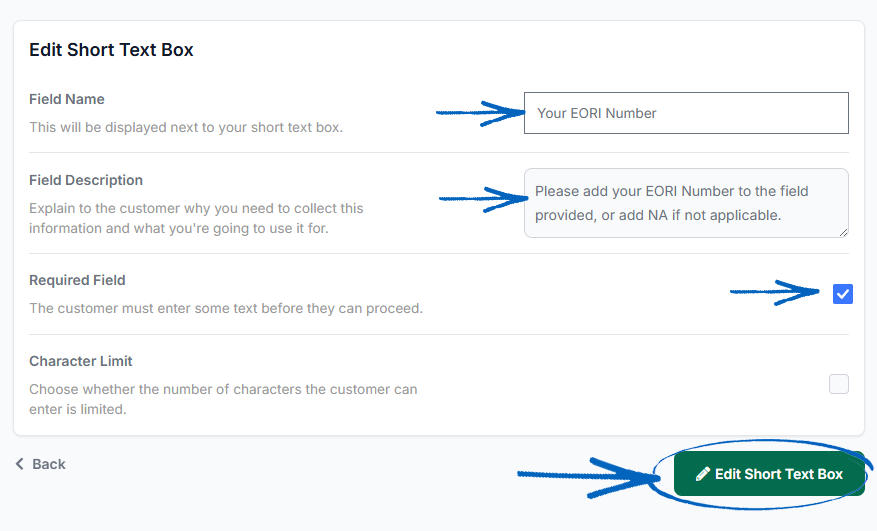
[tips]If your EKM online shop is purely B2B, you will need to tick the box for Required Field, to ensure that all customers progressing through your Checkout Flow add their EORI number. However, it does not have to be required if some of your customers are not B2B. In the image above, the field is set to be required, but adding some 'NA' text as we've done above ensures that all customers must interact. You will need to configure this setting in a way that best suits you and your customers. [/tips]
8. When your customers reach the Order Summary page of your Checkout Flow, they will then see this field beneath the payment methods: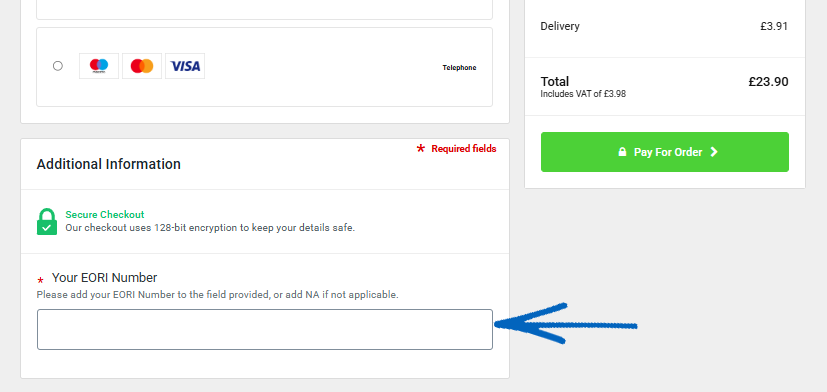
9. You'll then be able to view the EORI number on the order itself: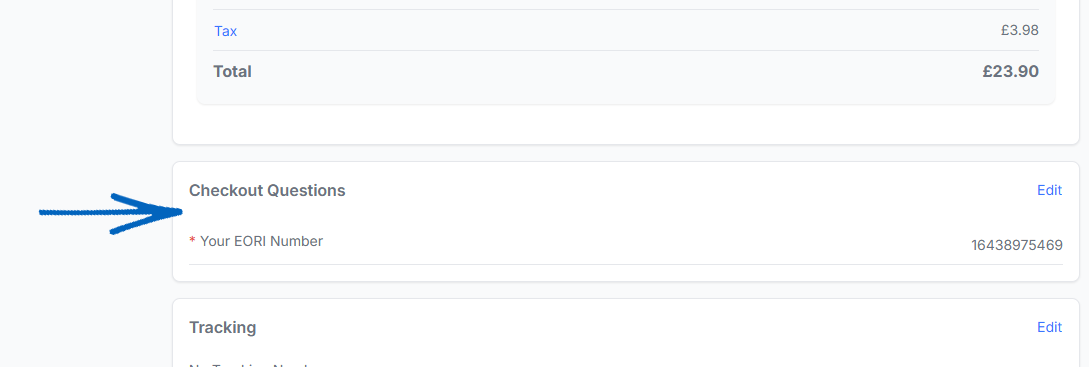
10. The EORI Number will also display on the invoice too:
[more]
[/more]
[contact]If you need our help with your EKM online shop, contact the Customer Support Team, who can point you in the right direction. Our opening hours are 9 am - 5.30 pm Monday to Friday, for telephone calls, live chats, and emails. Outside of these hours, you can leave a message for us in the live chat window or email [email protected], and we will answer as soon as possible. If you'd like to suggest a feature or an upgrade on any of the EKM platforms, please let us know on the EKM Suggestions Board. [/contact]